

How to Check and Verify Your Email Sending Domain in TheWebConsole
To help ensure emails sent through TheWebConsole (the backend of your website or database marketing accounts) reach your customers, your email sending domain needs to be correctly verified.
This involves checking three types of email authentication records: SPF, DKIM and DMARC.
The good news is that you don't need to understand the technical details or make these changes yourself. TheWebConsole makes it easy to identify what needs attention and provides the information your IT provider needs to complete the setup.
If you'd like to understand why these records are important, read our article: Why Email Verification Matters: Helping Your Emails Reach The Inbox.
Step 1: Open Email Domain Verification
Log in to your TheWebConsole account.
Go to Settings → Account Settings.
Select Email Domains Verification.
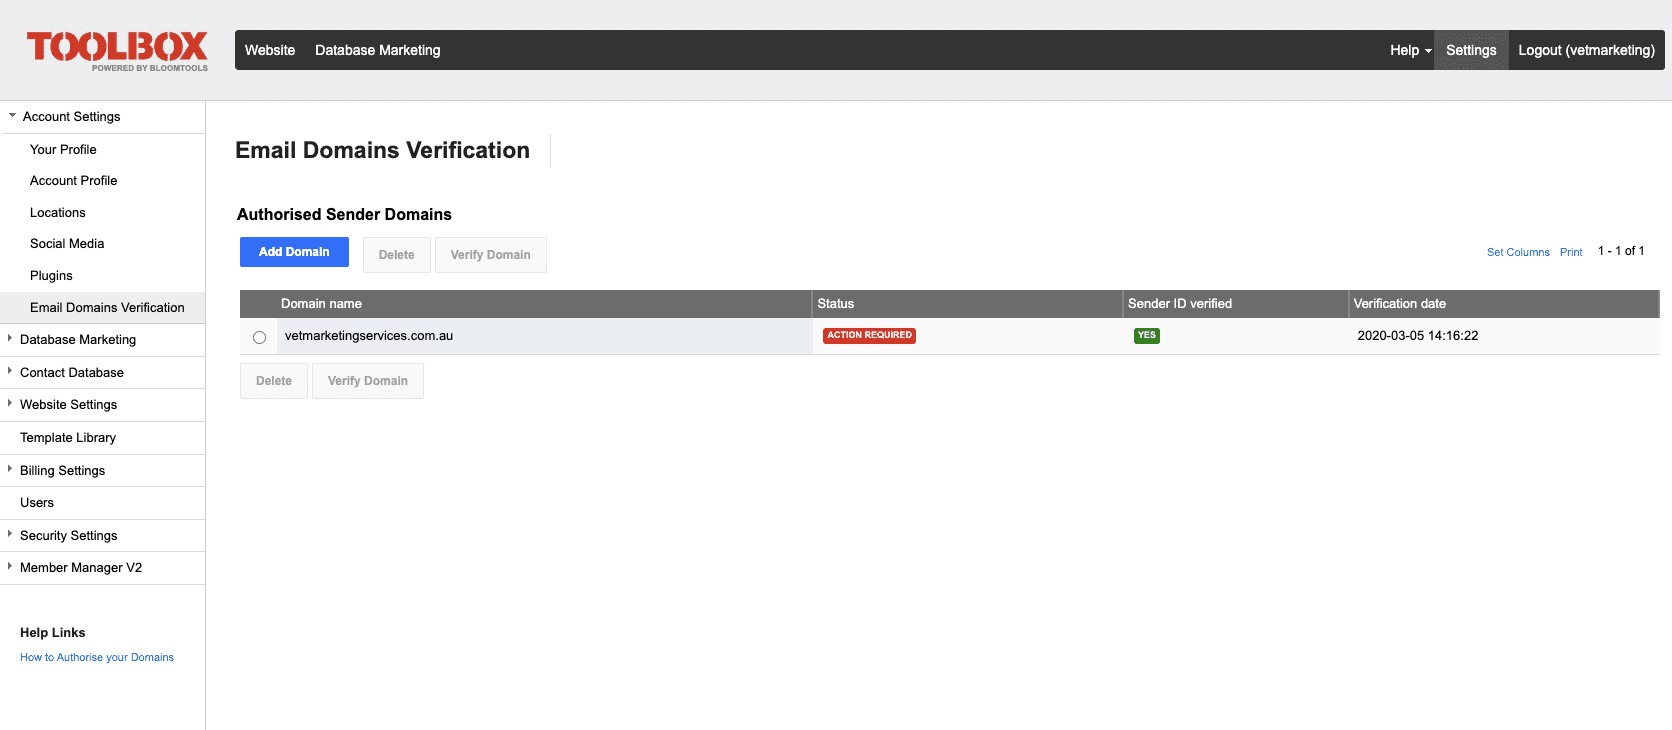
You will see a list of domains associated with your account and their verification status.
Step 2: Check whether any domains require attention
Look through the list of domains.
If a domain displays Action Required in red, it means one or more email authentication records need to be checked or updated.
If your domain is already fully verified, no further action is needed.
Only domains displaying Action Required need your attention.
Step 3: View your domain's verification details
Find the domain displaying Action Required, then click Verify Domain.
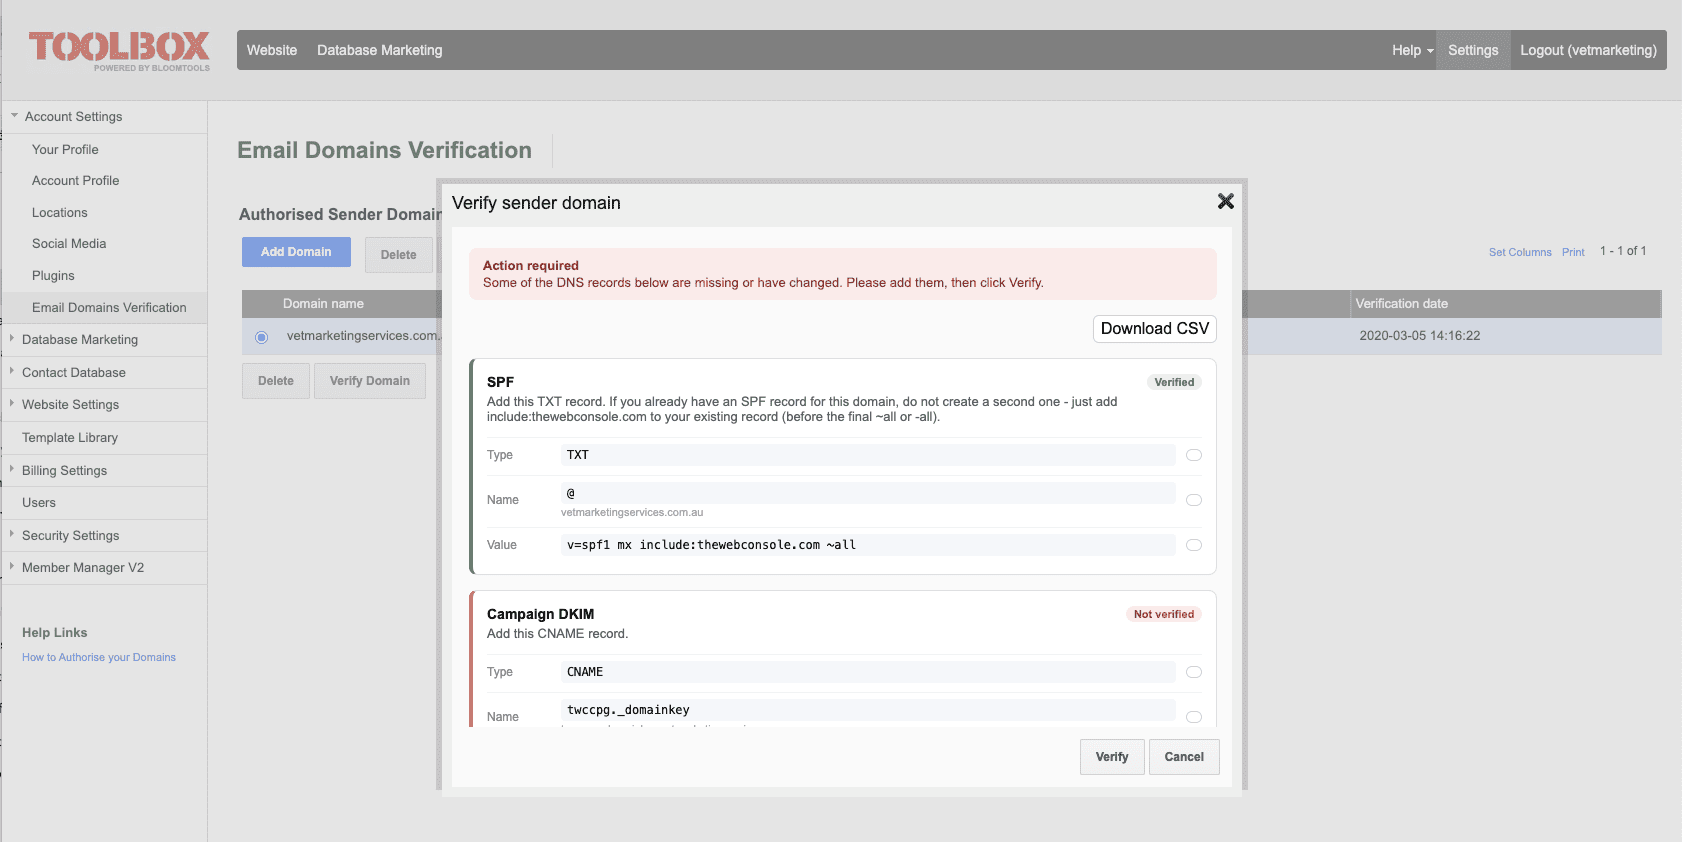
A window will open showing the individual email authentication records and their current verification status.
Some records may already be verified, while others may be highlighted in red.
What do the red records mean?
Any records shown in red have not passed verification and require attention.
Records that are already verified do not need to be changed.
Important: Only the records highlighted in red need to be addressed. Do not delete, replace or change records that are already verified.
This is especially important if you use other email services, such as Microsoft 365, Google Workspace or an external email marketing provider. Making unnecessary changes could affect your existing email services.
Step 4: Download your email verification records
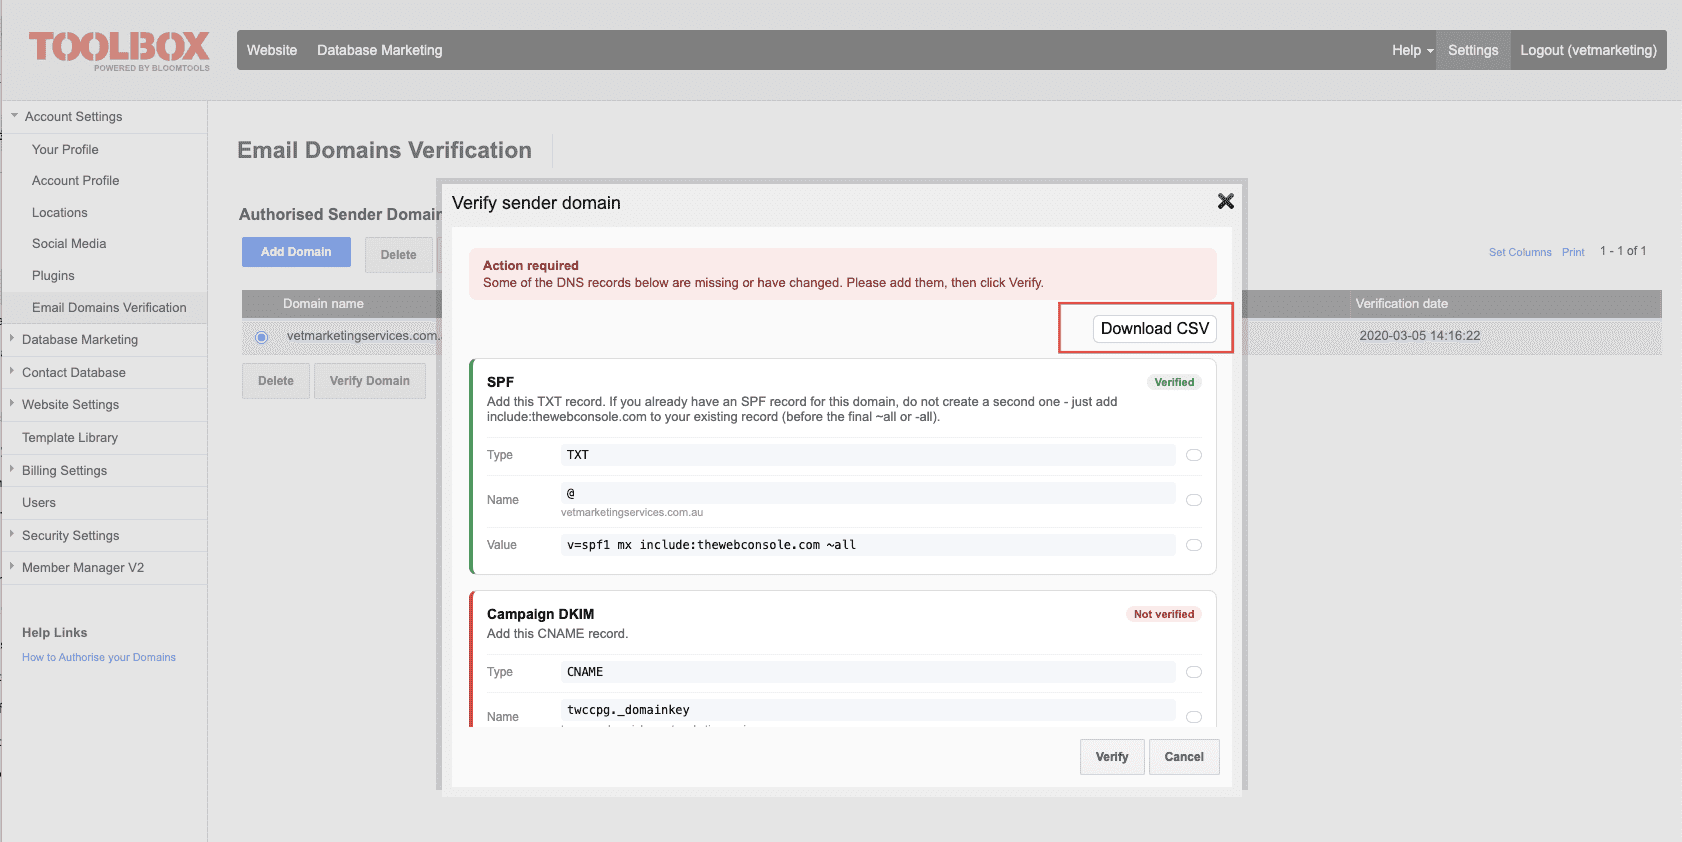
At the top of the domain verification window, click Download CSV.
This downloads a file containing the DNS record information needed to complete your email domain verification.
Save the file somewhere easy to find, such as your Downloads folder.
Step 5: Send the file to whoever manages your domain's DNS
The required records need to be added or updated within your domain's DNS settings.
If your domain or DNS is managed by an IT provider, website provider or domain hosting company, you can simply email them the downloaded CSV file.
Here's a suggested message you can copy and send:
Hi,
We need to complete email domain verification for emails sent through TheWebConsole for form messages/email campaigns.
I've attached a CSV file containing the required DNS records.
Could you please review the records and add or update only those that are currently failing verification (highlighted in red in TheWebConsole)?
Please leave any existing verified records unchanged and ensure that our current business email services continue working as normal.
Please let me know once the changes have been completed.
Thanks.
Step 6: Return to TheWebConsole and verify your domain
Once your IT provider confirms the DNS records have been updated:
Log back in to TheWebConsole.
Go to Settings → Account Settings → Email Domains Verification.
Select the relevant domain.
Open Verify Domain.
Click Verify to check the records again.
TheWebConsole will check whether the required email authentication records can now be verified.
If any records are still highlighted in red, they may need further attention.
Please note: DNS changes are not always recognised immediately. They can take time to propagate across the internet, so you may need to wait and check again.
What if I don't know who manages my DNS?
Don't worry. Many businesses aren't sure who looks after their domain's DNS settings.
Your DNS may be managed by:
The company where you registered your domain name.
Your website hosting provider.
Your IT support company.
The provider who originally configured your business email.
If you're unsure, start by checking with the company that manages your business email or website.
You can also contact your domain registrar (the company you pay to renew your domain name) and ask who manages the DNS records.
Not sure where to start?
Contact your website support team. They can help you understand what information is required and where to start, although the actual DNS changes may need to be made by your domain or IT provider.
Frequently Asked Questions
Do I need to change all my SPF, DKIM and DMARC records?
No. Only the records highlighted in red as requiring attention need to be addressed. Leave records that have already passed verification unchanged.
Will this affect my normal business emails?
It shouldn't require you to change how you send or receive your normal business emails.
However, your DNS may contain records used by Microsoft 365, Google Workspace or other email services. That is why it's important to have any changes made carefully and to preserve existing authorised email services.
Do I need to check my email verification regularly?
Once your records have been correctly configured and verified, there is generally nothing more you need to do.
However, if you change email providers, domain settings or the services sending emails on your behalf, your records may need to be reviewed.
What happens if I don't verify my domain?
Emails sent using your domain through TheWebConsole may have a greater risk of being rejected or sent to spam if the required authentication records are not correctly configured.
Completing verification helps establish that TheWebConsole is authorised to send emails using your business domain.